We are ready to make a custom item sheet for our Foundry VTT System. In this article, we cover how to create a custom Item Sheet for a new Foundry VTT System.
Building A Custom Item Sheet
Building a custom item sheet to display information about an item isn't hard to do.
We'll be going step by step in this article, so follow along as we build our own custom item sheet for our homebrew Foundry VTT System, FutureSpace.
Getting Started - Unifying The Data Template
If you have been following along in this series, you probably have a template.json file containing only item information.
That's actually fine for now, as this example only deals with the Item section of the Data Template.
However, let's go ahead and combine the Actor Template and the Item Template into the same JSON file.
Your template.json file should look like this:
template.json
Building The Custom Item Sheet From Scratch
Let's start by creating a custom sheet for the "weapon" Item type, as defined in template.json.
Step 1 - Create A New Item Sheet
Begin by creating a new folder at the root of your System to hold sheet templates. These are HTML templates that can be used to display information about the various item types in your System.
templates
sheets
Next, we copy the item sheet from the Foundry VTT App folder. This gives us a known-good barebones template to start from.
On my computer it was located here:
C:\Program Files\FoundryVTT\resources\app\templates\sheets
Copy item-sheet.html to the yourSystem\templates\sheets folder.
Let's have a look at the item-sheet.html file. It looks like this:
item-sheet.html
You can see this basic Item Sheet simply contains space for the item image and the item name. These are both created by default for every new item, so you don't have to define them in your Data Template.
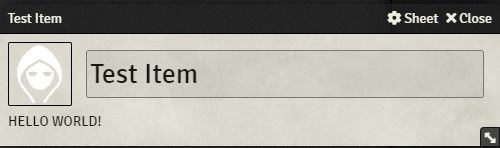
Let's modify this by adding in a "HELLO WORLD!" message in a paragraph container and saving the file as "weapon-sheet.html".
weapon-sheet.html
Step 2- Add JavaScript And Stir
In this step, we need to accomplish the following:
- Create a JavaScript module that exports the proper item sheet by changing the prefix before "
-sheet.html". - Create a javaScript module that imports the sheet, unregisters the Core Item Sheet, registers the new Item Sheet, and sets it as the default.
- Register the import/initialization module with the System.
Step 2.A- Creating The Item Sheet Export Module
We will store the JavaScript Modules in a folder on the root level of our system.
We'll write a JavaScript module that will export the sheet associated with the Item Type.
Since this is an Item Sheet, let's put it in a folder called "sheets".
module
sheets
Inside the module/sheets folder, make a new JavaScipt file called "myItemSheet.js".
We want to extend the ItemSheet class and then return the path to a variable filename that starts with the Item Type, as defined in the template.json file and ends in "-sheet.html".
Make your file look like this:
myItemSheet.js
Step 2.B- Create the Item Sheet Import and Initialization Module
In this module, we want to tell Foundry VTT which modules to import, then initialize the system, hook into the Foundry VTT Core, unregister the old item sheet, and register the new one.
Make a new JavaScript file on the root level of your System to act as the initialization module for your System.
Name it the same as your System and enter the following:
mySystem.js
Step 2.C- Register Your New System Core
You will need to go to the system.json file and add the name of this file to the esmodules array.
Open up your system.json and edit the esmodules line to look like this:
That's It!
You should now have a working Foundry VTT System with a custom Item Sheet.
Run Foundry VTT and create a new Item. You should see the "HELLO WORLD!" message displayed on the Item Sheet.
Adding Info To Your Custom Item Sheet
Customize your Item Sheet by using regular HTML, along with Handlebars helper functions to display additional info.
Access the item data model with the data object inside double braces like this: {{data.itemData}}
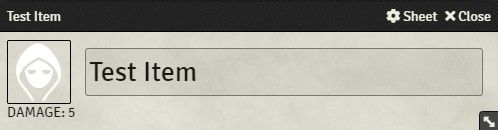
Using our Data Template example, let's add a DIV to hold the weapon damage.
weapon-sheet.html
Making it FutureSpace
Let's take a look at how I approached this for my FutureSpace homebrew Foundry VTT SYstem.
My file structure looks like this:
The Item Sheet HTML template looks like this:
weapon-sheet.html
Item Sheet Export Module
Let's create a folder called "module" and make a subfolder under that called "sheets".
Next, make a file inside "sheets" called "fsItemSheet.js" that will export an HTML template starting with the Item Type and ending in "-sheet".
fsItemSheet.js
Item Sheet Import Module And Initialization Hook
Now, we need to create an import module that links and registers all the custom sheets, unregisters the Core Item Sheet, and hooks them into the Foundy VTT API.
Create a folder called "templates" and make a subfolder inside called "sheets".
Inside the sheets folder, create a new JavaScript file called "futurespace.js" and make it look like this:
futurespace.js
Registering The FutureSpace Core Module
The last step is to register our new System Core JavaScript file with the Foundry VTT system.
Open the system.json file and add futurespace.js to the esmodule array like this:
Testing
Let's test our new custom Item Sheet in Foundry VTT.
Start Foundry VTT and go to the Items Directory and create a new item.
You should get a new item with a "HELLO WORLD!" message displayed on the sheet.
Troubleshooting
If your new custom Item Sheet doesn't come up, check your files for typos; I made a few on my first try.
Also, make sure to register your System Core in the esmodules section of the system.json file.
What's Next?
In the next article, we will spend some time adding detail to our custom Item Sheet.
Your Turn: What Do You Do?
Were you able to get a working custom Item Sheet? What part was the hardest? What part was easiest?
Do you have any tips or questions?
Tell me about it in the Comments Section. I'm interested in what you have to say about creating custom Item Sheets.
E-mail Notification Opt-in
Do you want to receive email notifications when we add new game design content?
Sign up on our private mailing list.
YES! Notify me of new game design posts!